One of the most common challenges quilters face—whether they are beginners or experienced—is dealing with wavy or uneven seams. Even small inconsistencies can affect the alignment of blocks, distort quilt tops, or make borders ripple. While quilting is a forgiving craft, mastering smooth, straight seams dramatically improves the professionalism of your final piece. The good news is that wavy seams are usually caused by simple, preventable issues. With proper techniques, tools, and habits, you can achieve perfectly flat seams and beautifully aligned quilts. This guide will walk you through the best tips to avoid wavy or uneven quilt seams.
Understanding the Most Common Causes of Wavy Seams
Before fixing a problem, it helps to understand what causes it. Wavy seams often result from:
Stretching fabric while sewing
Inconsistent seam allowances
Improper thread tension
Unpressed or incorrectly pressed seams
Using the wrong needle or thread
Poor fabric handling
Too much speed on the sewing machine
Once you identify the root cause, avoiding wavy seams becomes much easier.
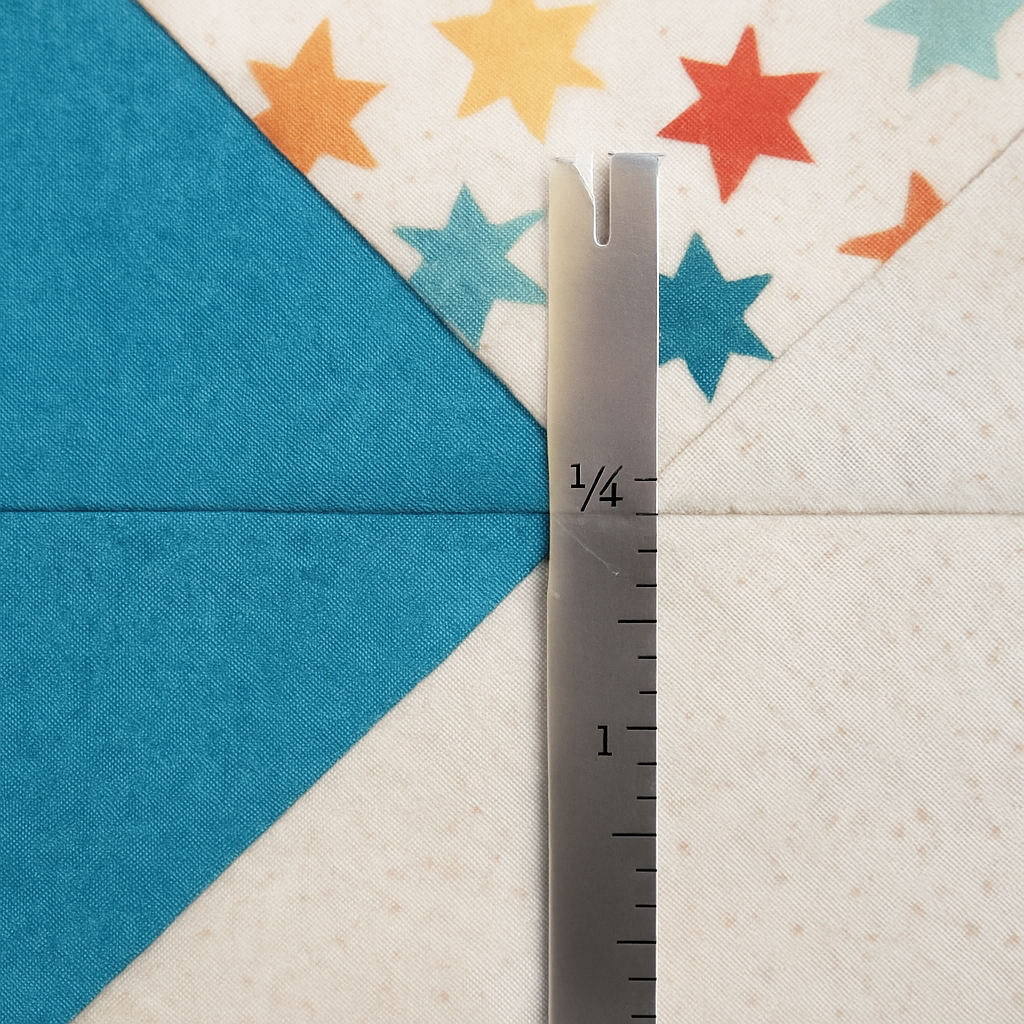
Use a Consistent 1/4-Inch Seam Allowance
Most quilt patterns require a precise 1/4-inch seam allowance. Even slight deviations—like 1/8 inch too wide or narrow—can throw off your entire block alignment. To maintain consistency:
Use a 1/4-inch quilting foot
Mark a guide on your sewing machine
Practice sewing straight lines on scrap fabric
Check your accuracy regularly using a ruler
A consistent seam allowance is essential for sharp, clean results.
Avoid Stretching the Fabric
Stretching fabric is the number one cause of wavy seams. Quilting cotton stretches slightly when pulled, especially along the bias (diagonal direction). To prevent distortion:
Let the feed dogs guide the fabric
Use a light touch—no pulling or pushing
Hold fabric gently and keep it flat
Support heavy quilt tops so they don’t drag
Even small amounts of stretching can cause waves that grow worse as you assemble the quilt.
Press, Don’t Iron
Pressing and ironing are not the same. Pressing involves lifting and placing the iron onto the fabric, while ironing slides the iron back and forth, which can stretch the fabric. To avoid distortion:
Use a gentle pressing motion
Press from the front and back of seams
Allow the fabric to cool before moving it
Use steam only when needed
Correct pressing strengthens seams and keeps fabric square.
Starch Your Fabric Before Cutting
Starch adds stability to quilting cotton, making it easier to cut and sew. When fabric moves less during stitching, seams stay straight. Light starching helps prevent wavy seams by:
Reducing stretch
Keeping edges crisp
Improving accuracy in cutting
Spray starch or starch alternatives work well. Apply lightly, allow to dry, and then press the fabric flat.
Check Thread Tension and Machine Settings
Incorrect tension can cause seams to wobble or pull. Signs of poor tension include:
Loose stitches on the backside
Puckering fabric
Thread looping or knotting
To prevent these issues:
Use matching top and bobbin thread
Adjust tension settings slowly
Test on scrap fabric before sewing your project
Clean your machine regularly to remove lint
Proper tension results in smooth, even lines.
Slow Down Your Sewing Speed
High-speed sewing can cause fabric to shift or stretch. Slowing down helps maintain control and accuracy. Sewing at a moderate pace allows:
Better alignment
Cleaner seams
Less drag on the fabric
More time to correct mistakes
Quality matters more than speed in quilting.
Use the Right Needle and Thread
Using the wrong needle size can cause skipped stitches or uneven seams. For quilting cotton:
Use a size 80/12 or 75/11 quilting needle
Choose a strong cotton or polyester thread
Replace needles frequently to avoid pulling
A sharp, clean needle glides smoothly and keeps seams neat.
Pin or Clip Pieces Carefully
Pinning helps prevent fabric from shifting while sewing. Use:
Fine quilting pins
Clips for bulky seams
Pins placed perpendicular to the seam line
Avoid over-pinning—use enough to secure but not distort the fabric.
Pinning corner intersections helps ensure perfect alignment.
Sew With Proper Fabric Orientation
Fabric cut on the bias stretches more easily. When possible:
Place bias edges carefully
Avoid sewing long seams on bias edges
Handle bias edges as little as possible
If a block includes bias pieces (such as triangles), be extra careful not to stretch while sewing.
Press Seams Open or to One Side
Pressing seams open reduces bulk and helps pieces lie flat. Pressing to one side strengthens seams and is more traditional. Choose the method based on:
Pattern requirements
Block construction
Personal preference
Whichever method you choose, keep seams consistent to avoid distortion.
Use a Walking Foot for Long Seams
A walking foot feeds the top and bottom fabric layers evenly, preventing shifting. This foot is especially helpful for:
Borders
Sashing
Long rows
Thick seams
It can significantly reduce ripples and seam distortion.
Square Up Your Blocks
Even if your seams are accurate, blocks can become slightly uneven. Squaring up ensures every block fits together perfectly. Use a rotary cutter and square ruler to trim:
Uneven edges
Excess fabric
Misaligned corners
Square blocks produce smooth seams and a clean overall quilt top.
Avoid Overhandling Fabric
The more you touch and manipulate fabric, the more likely it is to stretch. Try to:
Sew pieces soon after cutting
Handle each piece as little as possible
Avoid pulling or twisting fabric during assembly
Minimizing handling keeps seams straighter.
Check Your Cutting Accuracy
Wavy seams sometimes come from pieces that were cut inaccurately. Use:
Sharp rotary blades
Clear acrylic rulers
A self-healing mat
Consistent pressure
Accurate cutting means less adjustment during sewing, which results in smooth seams.
Prewash Fabric (Optional)
Some quilters prewash to remove sizing and prevent shrinkage. Prewashing can help prevent waves caused by:
Fabric relaxation
Uneven shrinking
Stiffness vs. softness issues
If you prewash, press the fabric carefully before cutting to maintain accuracy.
Block Your Quilt Top
If your seams are slightly wavy after assembly, blocking can help. Lightly spray your quilt top with water and pin it into shape on a flat surface. Allow it to dry completely. This technique helps relax small distortions.
Final Thoughts
Avoiding wavy or uneven seams is all about developing good habits and handling your materials with care. With consistent seam allowances, proper pressing, accurate cutting, and mindful sewing techniques, your quilt tops will become flatter, straighter, and more professional. As you practice these skills, you’ll notice a significant improvement in the precision and beauty of your quilts. A smooth seam may seem like a small detail, but it contributes greatly to the overall quality of your finished work.