A baby quilt is one of the most meaningful handmade gifts you can create. Soft, comforting, and full of love, a baby quilt becomes a treasured keepsake that families hold onto for years. Whether it’s for your own child, a friend, or a baby shower gift, making a quilt from start to finish is a rewarding experience. Baby quilts are smaller than standard quilts, making them perfect projects for beginners or quilters who want a quick but heartfelt creation. This guide walks you step-by-step through the entire process of sewing a baby quilt, from choosing fabrics to finishing the final binding.
Choosing the Right Fabrics
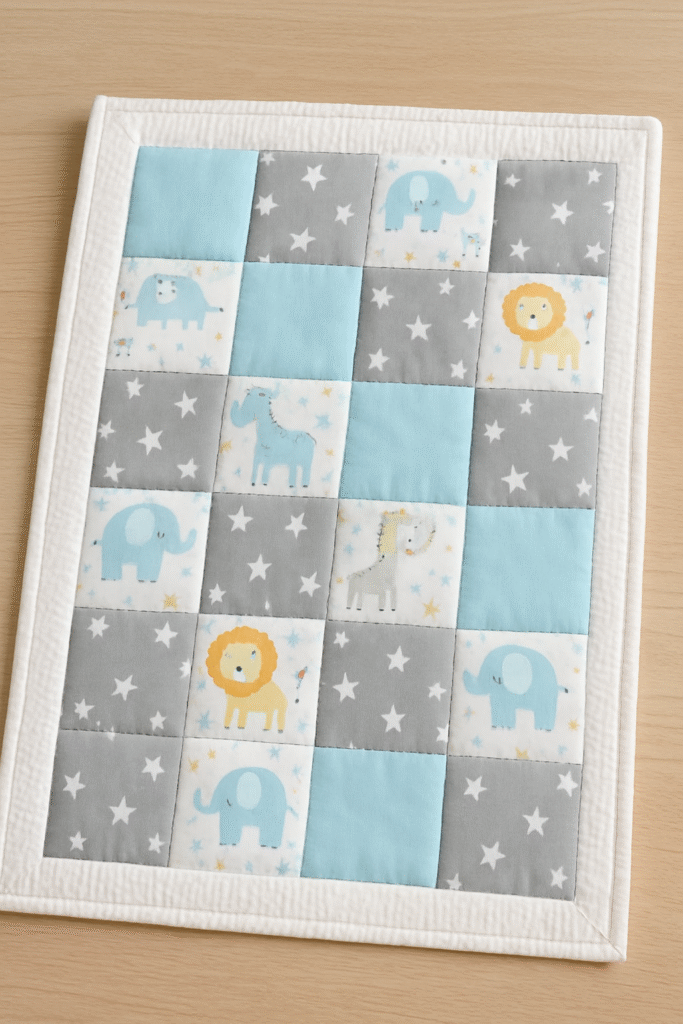
Baby quilts should be soft, safe, and durable. The best choice is 100% cotton quilting fabric because it is breathable, high-quality, and easy to wash. When selecting fabrics, consider gentle colors or playful prints, such as animals, stars, florals, or geometric shapes. High contrast can be visually stimulating for babies, while pastel colors create a calm and soothing effect. You will also need cotton batting and a backing fabric such as flannel, which adds extra softness. Avoid rough fabrics, loose fibers, or anything that could irritate a baby’s skin.
Selecting the Quilt Pattern
Choose a simple pattern if you are a beginner. Baby quilts do not require complex designs to be beautiful. Popular baby quilt patterns include:
Patchwork squares
Half-square triangles
Simple strips
Four-patch or nine-patch blocks
Chevron or zigzag patterns
Minimalist modern blocks
Because baby quilts are small, even a basic pattern looks polished and intentional. More advanced quilters may enjoy appliqué themes like animals, hearts, or alphabet letters.
Preparing and Cutting Your Fabric
Accurate cutting ensures your quilt pieces fit together nicely. Use a rotary cutter, cutting mat, and acrylic ruler for precision. Wash and press your fabrics before cutting to prevent shrinkage later.
For a simple patchwork baby quilt, cut equal-size squares—often 5-inch or 6-inch squares work well. For strip quilts, cut long strips of fabric with consistent width. Organize your cut pieces in neat stacks so the sewing process flows smoothly.
Planning Your Layout
Lay your cut pieces on a large flat surface to plan the quilt layout. This allows you to:
Balance colors
Distribute prints evenly
Identify repeated patterns
Adjust for visual harmony
Take a photo of your layout before sewing so you can reference it later. Planning the arrangement ensures your quilt looks cohesive and pleasing.
Sewing the Quilt Top
Once your layout is finalized, begin sewing the quilt top. Sew pieces together row by row using a quarter-inch seam allowance. This is the standard seam width for quilting and helps ensure accurate block size.
Press seams after each row is completed. Pressing is crucial for flat, smooth seams and makes assembling the quilt top easier. Some quilters press seams to one side, while others press them open—either method works as long as you stay consistent.
After creating all the rows, sew them together carefully, aligning seams for a neat, professional look.
Preparing the Quilt Sandwich
A “quilt sandwich” consists of three layers:
The quilt top
Batting
Backing fabric
To assemble your layers:
Lay the backing fabric right side down.
Place the batting on top.
Add the quilt top right side up.
Smooth all layers to remove wrinkles.
Use basting spray or safety pins to hold everything in place.
Because baby quilts are smaller, this step is easier than with larger quilts.
Choosing a Quilting Design
Quilting stitches secure the three layers together and add texture. You can quilt by hand or with a sewing machine. Popular baby quilt quilting styles include:
Straight-line quilting
Stitch-in-the-ditch (sewing along the seams)
Diagonal lines
Wavy lines
Free-motion meandering
Choose a quilting pattern that complements your quilt design. Simple straight lines give a clean, modern look, while curved lines add softness.
Quilting the Layers Together
Begin quilting from the center of the quilt and work outward to avoid shifting or bunching. Take your time, especially if you are new to quilting. Check tension regularly to ensure stitches look even on both sides. Quilting adds durability, ensuring the quilt holds up through many washes.
Trimming the Edges
After quilting, square up the quilt by trimming the excess batting and backing fabric. Use a large acrylic ruler to ensure clean, straight edges. Squaring up ensures the binding will attach smoothly and evenly.
Making and Attaching the Binding
Binding finishes the edges of your quilt. For a baby quilt, cut strips of fabric 2¼ or 2½ inches wide. Join the strips diagonally to reduce bulk, then press the binding in half lengthwise.
To attach the binding:
Align the raw edge of the binding with the raw edge of the quilt top.
Sew around the perimeter using a quarter-inch seam allowance.
Create neat mitered corners by folding the binding carefully at each turn.
When you reach the starting point, join the ends with a diagonal seam.
Wrap the binding to the back of the quilt and stitch it down by hand or machine.
Hand stitching creates a clean, nearly invisible finish, while machine stitching is faster and more durable—perfect for baby quilts that will be washed frequently.
Washing and Softening the Quilt
Once the binding is finished, wash the quilt gently to soften the fibers and give it a cozy feel. Many quilters use fragrance-free detergent to protect sensitive baby skin. After washing, dry the quilt completely and give it a final press if needed.
Personalizing Your Baby Quilt
Adding personal touches makes the quilt even more meaningful. Consider including:
An embroidered name or initials
A special date (birth or baby shower)
A themed appliqué such as animals, stars, or hearts
A color palette inspired by the nursery décor
These small details transform the quilt into a cherished heirloom.
Why Handmade Baby Quilts Are So Meaningful
A handmade quilt represents care, time, and love. Babies may outgrow clothes and toys, but a quilt often stays with them well into childhood—or even adulthood. It becomes a reminder of warmth, comfort, and the hands that created it. Whether you’re a beginner or an experienced crafter, making a baby quilt is a truly rewarding project.