Starting your first quilt is an exciting moment. Quilting combines creativity, patience, and technique in a way that allows you to turn simple pieces of fabric into something beautiful and meaningful. Whether you’re making a quilt for yourself, a loved one, or a special occasion, your first project is a chance to learn essential skills that will help you grow as a quilter. This guide walks you through every step of the quilting process, from choosing materials to binding the edges. By the end, you’ll have the knowledge and confidence to complete your very first quilt successfully.
Choosing the Right Pattern
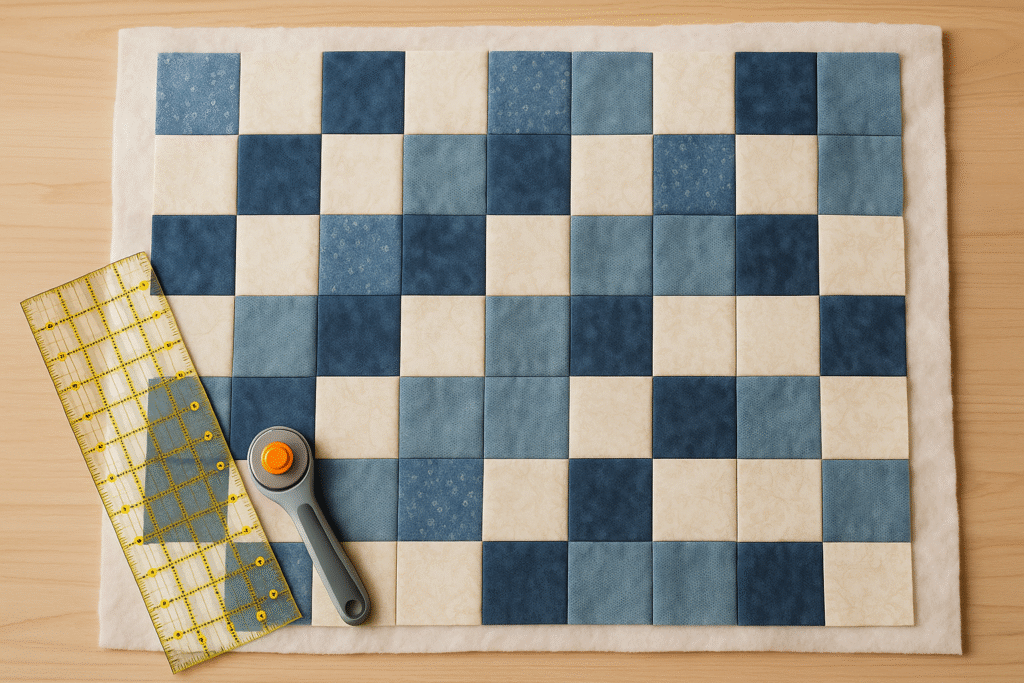
The first step in making your quilt is selecting a beginner-friendly pattern. Simple patterns such as the Four Patch, Rail Fence, or Nine Patch are perfect starting points because they use basic shapes and straightforward construction methods. You don’t need anything complicated for your first project. Look for patterns that involve squares or rectangles, as these are easier to cut and sew accurately. Avoid triangles, curves, or intricate layouts until you feel more comfortable with quilting basics. Choosing a simple pattern ensures you’ll enjoy the process and avoid feeling overwhelmed.
Gathering Your Supplies
Before you begin sewing, make sure you have all the necessary tools and materials. You’ll need quilting cotton fabric, a rotary cutter, a cutting mat, acrylic rulers, thread, pins or clips, an iron, and a sewing machine. Although some quilters prefer hand sewing, using a machine will make the process faster and more forgiving for beginners. For your first quilt, choose fabrics in colors and prints that coordinate well. Light to medium-weight cotton is the best choice because it’s easy to cut, press, and sew. As for batting, select a low-loft cotton or cotton-blend batting because it is smooth, stable, and easier for beginners to quilt through.
Cutting Your Fabric
Accurate cutting is essential for a well-made quilt. Begin by pressing your fabric with an iron to remove wrinkles. Place the fabric on your cutting mat and use a rotary cutter with an acrylic ruler to cut the pieces according to your pattern. Always take your time, double-check measurements, and keep your fingers safely tucked away from the blade. Remember that consistency is more important than speed. If your pieces are all cut to the correct size, they will fit together nicely when you sew. Misalignment usually happens when pieces are cut too quickly or without careful measuring.
Sewing the Quilt Top
Once all your pieces are cut, it’s time to begin sewing. The quilt top is the decorative front layer of your quilt. For beginners, it’s typically assembled in rows or blocks. Start by sewing small units together using a quarter-inch seam allowance, which is the standard in quilting. This helps ensure your pieces line up neatly. Press each seam with an iron after sewing to keep the fabric flat and reduce bulk. Some quilters press seams open, while others press them to one side; both approaches work, so choose whichever feels easier for you. Continue sewing blocks or rows until the entire quilt top is assembled.
Adding Borders
Although borders are optional, they can enhance the appearance of your quilt and help square up the edges. Borders are simply long strips of fabric sewn around the edges of the quilt top. If you decide to add them, measure your quilt carefully and cut your borders accurately. Sew the side borders first, then attach the top and bottom borders. As you sew, be careful not to stretch the fabric, as this can cause the borders to ripple. After attaching them, press the borders with an iron to keep everything smooth.
Building the Quilt Sandwich
A quilt consists of three layers: the quilt top, the batting, and the backing fabric. These three layers are stacked together to form what quilters call the “quilt sandwich.” Lay the backing fabric on a large, flat surface with the right side facing down. Smooth it out to remove wrinkles. Next, place the batting on top, followed by the quilt top with the right side facing up. The batting and backing should be slightly larger than the quilt top to allow for shifting while quilting. Make sure all three layers are perfectly aligned and smooth. Pin or clip the layers together to prevent movement during quilting.
Basting the Layers
Basting secures the three layers of your quilt so they don’t shift while you sew. There are several methods to choose from: pin basting with safety pins, thread basting with long stitches, or spray basting using a temporary adhesive. Safety pin basting is the easiest method for beginners because it requires no special tools. Starting from the center of the quilt, place pins every few inches and work outward toward the edges. The goal is to keep the layers stable and flat throughout the quilting process.
Quilting the Layers Together
Quilting refers to the stitches that hold all three layers of the quilt together. For your first quilt, the easiest method is straight-line quilting. You can sew straight lines horizontally, vertically, or diagonally across the quilt. This creates a clean, modern look and is very beginner-friendly. If your sewing machine has a walking foot, it will help feed the fabric layers evenly and prevent shifting. Start in the center of the quilt and work outward to keep the layers smooth. Take your time and maintain consistent stitch length. Quilting doesn’t need to be complicated to be effective. Even simple lines can create a beautiful finish.
Trimming the Quilt
Once the quilting is complete, the quilt may have slightly uneven edges due to fabric shifting during sewing. Use a rotary cutter and ruler to trim the edges so they are straight and square. Make sure the corners form right angles. Trimming also prepares the quilt for the binding process. This step may feel final, but it’s important to stay precise so the binding will attach neatly.
Binding the Edges
Binding is the final step in making your quilt. It involves wrapping the edges of the quilt with a fabric strip to give it a clean, finished look. Cut strips of fabric about 2.5 inches wide and sew them together end to end to form a long strip. Fold the strip in half lengthwise with the wrong sides together. Attach the raw edge of the binding to the raw edge of the quilt, sewing it around the perimeter. When you reach the corners, fold the binding to create neat mitered corners. After sewing the binding to the front, fold it over to the back of the quilt and hand-stitch it in place using small, invisible stitches. This final touch gives your quilt a polished finish that feels professional and durable.
Enjoying Your Completed Quilt
Finishing your first quilt is an accomplishment to celebrate. Beyond the practical value of the quilt itself, you’ve learned important skills—cutting accurately, sewing seams, pressing fabric, quilting layers, and binding edges. Every quilt you make will feel easier as you gain confidence and familiarity with the process. Your first quilt is more than a craft project; it’s a milestone that marks the beginning of your creative journey in quilting. As you continue to explore new patterns and techniques, you’ll develop your own style and enjoy countless hours of artistic expression.